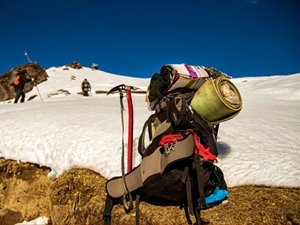
Packing your rucksack/backpack carefully for a trekking trip is simple but give due priority. On the Himalayas it is mandatory that a backpacker/trekker must have essential and mandatory items, yet light enough to move comfortably.

The treks on the different parts on the Himalayas stretch from short and medium to extended long duration. Shorter duration trek backpacking is easier but medium to long duration are need to be packed carefully. Higher the duration of the trek, higher the importance.

For serious trekkers, there is no way other than to pack his/her Rucksack with attention to ensure own safety. The catch is to pack light with all the necessary and safety items with you.

Every gram on the mountain matters. Quality light weight products are often expensive.  These are designed to meet standards on harsh climate. I would personally assert to acquire/buy such clothing/equipment one by one, if not all together.

Following items are absolutely mandatory for any trekking trip.

1)      A Rucksack

2)      A trekking shoe

3)      Warm Jacket

4)      A Windproof

5)      Sleeping Bag

On how to select the items read:

https://dev.himalayatrekker.com/trek-essentials/selection-of-equipment

Here I would focus on how to pack everything in one single Rucksack/Backpack with high safety. There are treks where one gets an option to offload some weight, leaving a luggage at the base camp. While returning you can pick the left luggage. In certain popular and safer routes trekker has the opportunity to offload the Rucksack on a mule or even to a porter. But crossing a pass or most of the longer duration trek will require packing everything in one Rucksack and carry it all through. A medium duration trek can involve 4-7 trekking days and longer duration ranges between 8 to 12 trekking days.

A mid to long duration trekking Rucksack should weigh between 8 to 12 Kg. Trekkers should grow the habit to carry it comfortably. This is to ensure higher safety of the trekkers as well as leaving lesser footprint and thus sustainable.

I have seen various articles on internet about what are the things to carry in a trek. The extended generic list of article amazes me every time. The paraphernalia goes on and on. To follow, one has to carry a rucksack sometimes touching almost 20 Kg!

Essentially a trekking Rucksack/Backpack on the Himalayas will contain:

  1. Clothing
  2. Windproof/Waterproof/Rain gear
  3. Sleeping Bag
  4. Accessories
  5. First-Aid/Medical Kit
  6. Dry food items to sustain a day in emergency condition

For his/her own safety a trekker should always carry the following items in rucksack on a Difficult/Hard grade trek.

  1. Warm jacket
  2. Windproof plus waterproof gear
  3. Sleeping bag along with carry mattress
  4. Emergency dry food items

Rucksack: The first step is to select a proper Rucksack as per your requirements. Often we buy unutilised bigger or too small a backpack.  Keeping in mind the medium to long duration treks, it is sufficient to use a Rucksack/Backpack between 45 to 50 Litre.  A 50 L one has enough space inside to pack everything including your sleeping bag for a trek up to 2 weeks. One such bag should weigh within 1.5 Kg.

Clothing: Always use synthetic quick dry t-shirts. Cotton tees are heavy and take time to get dried. 4/5 t-shirts are good enough for a home to home round trip. For lower use again the synthetic light weight/quick dry trousers.  2/3 such trousers are good. Don’t use comfortable jeans unless there is an option to leave luggage at base camp. A Cargo/Six-pocket can be used instead. Together upper and lower wear should not weigh more than 2 Kg.

Innerwear, socks, cap, balaclava, gloves are lighter items and should be within 500g.

For a high altitude trek an upper thermal base layer (Woolycot) is essential.  The lower one is optional. Normally protection is vital for upper portion of the body. Adds another 500g to your back.

Warm jackets are of different types and varying weight.  Normally a Fleece/Synthetic Fill/Down jacket is light and provides adequate warmth.  The weight should be within a Kilogram for such a jacket.

A windproof upper with hood is also a must item. Normally these will have water repellent property. A typical Raincoat/Poncho is not recommended as these are heavy and not breathable, unless you are trekking in monsoon.

Sleeping Bag: For a Himalayan trek Sleeping bags are rated for a temperature ranging between -10° C to 0° C.  For colder temperatures you can use one additional base layer while sleeping. Synthetic bags weigh up to 2 Kg whereas a Down feather filled sleeping bag is much lighter.

Accessories: You have to be careful to select what to take and what to discard. My approach is being minimalist to choose from a wide range of items. A tooth paste (Small tube of Rs 10), toothbrush, tissue roll, a Boroline/chap stick, a scissor, (or a light weight multi tool), a torch, soap strip and a small container of cold cream are good for the purpose. Maybe a small deo-spray  on top of these. Don’t carry a shaving or a beautifying kit 🙂 . Together these should not weigh more than 500 g.

First-Aid cum Medical Kit: A crepe bandage, cotton, Dettol/Savlon, antiseptic creme, a medicine course for each including headache, vomiting, anti-inflammatory, pain killer, and stomach upset. Volini spray. Together all these weigh again maximum of 500 g.

Keep some dry instant edible food items for emergency. A pack of candy, few chocolate bars/energy bars, dry fruit mix and a small pack of Glucon C/D/Gatorade.  Another 500 g.

Wait, we are not done yet! A bottle of water is must. Ask the guide clearly whether you will be able to refill the bottle on the trail. For a long trekking day and scarce water, you may need to carry 1.5 L of water.  Weighs additional 1.5 Kg.

Adding up the items, total weight remains not more than 10 Kg (including the sleeping bag and the Rucksack itself)

An example: Let me give the details of my packed Rucksack for an idea and let us measure the weight.

Rucksack: Camp M4 – 40L – 1 Kg

T-Shirts, trek pants, innerwear, socks, caps, gloves etc.:  ~ 2 Kg

Warm Jacket:  Mountain Hardware Windstopper Tech Fleece ~ 650g

Windproof/Waterproof:  Marmot Precip Jacket ~ 370 g

Sleeping Bag: Mountain Hardware Ultralamina 15° F/-9° C ~ 1.3 Kg

Accessories and Medical Kit: ~ 1 Kg

Water: Hydration pack of 1L ~ 1 Kg

Miscellaneous:  Notebook, pen, GPS, Binocular etc ~ 1 Kg

Camera:  Panasonic Lumix DMC FZ200 with additional batteries ~ 1 Kg

Now you believe that I am able to pack everything within 10 Kg 🙂 .

Order of packing different items is important once you know what to pack,. Things you may need while walking should be kept on top. Sleeping bag should go in the bottom, as you don’t need it before campsite. This gives stability to the Rucksack. A well packed Rucksack would stand straight on the ground without a support.   Pack similar items together. Its easier to carry a backpack when the load is evenly distributed.

Occasional rain or drizzle is common on mountain. Use a waterproof Rucksack cover/Rain fly. Your warm jacket and sleeping bag must not get wet in any condition during a trek. For double protection use a polythene inner liner sheet. Even if your pack is wet outside, the inner liner will keep your items dry and toasty.

I hope that now you are confident about what and how to pack for a trekking trip to the Himalayas.

To finish, I would say that backpacking is an art and pack rationally!

Happy packing :-)

Are you looking for a snow trek next winter?

Check out this video

Share this:

This is perhaps a very important aspect while you are on mountain but often neglected. The importance is felt during any demanding trek on the Himalayas and should not be compromised.

In any trek, for beginners or experienced ranging from easy to difficult, selection of the following personal gears need attention and some guidelines are given below:

[/vc_column_text][/vc_column][/vc_row]

Footwear:

Trekking footwear is broadly classified as:

  1. Trekking Shoe
  2. Trekking/Backpacking Boots

Generally the Boots are heavier and durable and at the same time costlier than that of the Shoes.  Often Boots are meant for walking on the adverse trekking trail with hauling load where as the shoes perform fine on the trails while the total load exerted remains relatively less.

While buying a Trekking Shoe/Boot the following qualities should be checked.

i) Weight: Weight is one of the most important considerations when purchasing a shoe that you’ll be using for hiking or backpacking. 1 Kg on your feet is equal to 5 Kg on your back, so it is crucial to find light footwear to give you comfort on the trail without additional fatigue.

ii) Traction/Sole: You must buy one with a rubber sole. Choice of a Vibram rubber sole is better than the regular rubber as it provides a better grip and stuck efficiently on different terrains.

iii) Support:  Mid or High Ankle shoes provide much needed support, especially on loose boulders, scree and while descending.  It is essential for protecting your feet from an ankle twist. Also do check the heel support of your shoe.

iv) Water proofing/resistance & Breath ability:  Shoes made of mesh will have less water proofing/resistance property. Breathability of a shoe is nice to have which keeps the ventilation while keeping your feet dry from inside. A Gore-Tex lining inside is the best choice though there are other available technologies too which are much cheaper.

Unfortunately there is almost no choice of Backpacking Boots in India which are readily and consistently available.  Few world renowned trekking and backpacking footwear companies are La Sportiva, Lowa, Scarpa, The Northface, Asolo, Salomon, Merrell, etc. Considering availability in India, Quechua Forclaz 500 is a decent choice for a Trekking Shoe.

Trekking Shoe
Backpacking Boot

Clothing:

On mountain quality clothing is highly recommended. Proper clothing consists of a base layer, a mid layer and an outer layer. In some occasions the later two are combined with a thick and heavy jacket. Keep in mind of the following type of products while buying. Some world famous and quality clothing companies are Mountain Hardwear, Patagonia, Arcteryx, Mammut, The Northface, Marmot etc. In India choices are limited. Decathlon stores sell some varieties of clothing which are decent in quality.

1) Base layer: This is the inner most layer or first layer of clothing.

A) T-Shirt/Upper: Mostly in the lower altitudes trekkers use a base layer which is essentially a t-shirt either a full or a half sleeve. This should be carefully chosen in aim to comfort, breath ability and some warmth.  Synthetic materials with moist wicking capability should be the prime focus. A full sleeve dry fit t-shirt can keep you dry and comfortable while protecting from the scorching sun.

Full sleeve T-shirt

B) Trek Pant/Lower: It is important to be wearing pants that are both comfortable and fit your body well enough to perform the activity in which you are engaged.  Quality Hiking and trekking pants are made of nylon with added spandex or polyurethane to add stretch ability. Hiking pant should be comfort driven, durable, weather resistance and quick drying. Ideally pants offer water resistance from light rain, breath-ability in hot climates, insulation in cooler conditions, protection from strong winds, and UV protection from the sun. Sometimes convertible pants are useful for varying weather conditions. For cold conditions or walking on continuous snow a thermal base layer can be used under the trek pant.

Hiking Pant
Convertible Pant

2) Mid layer: Your mid layer is essentially the jacket which will keep you warm and toasty on the mountain. Jackets can be of different type:

A) Fleece Jacket: This is a very effective mid layer made of synthetic materials and best when underneath a wind or water resistant shell. Modern day fleeces are pretty warm for their weight, highly compressible and comfortable. Fleece jackets are stretchable and provide more flexibility while on the go. You have to use a windproof jacket or shell on top of a fleece for cold conditions.

Fleece Jacket
Fleece Jacket

B) Insulated Jacket: These are made of synthetic insulation and  air is trapped between layers of insulation. A well chosen insulated jacket can give you the desired warmth and to an extent the protection against wind. These kinds of jackets are cheaper with a wide range of variety.  These kinds of jackets are normally the heaviest and may not be suitable when you need to backpack in a lightest way.

Insulated Jacket
Insulated Jacket

C) Down Jacket: A good down jacket is the best option and is typically expensive.  A jacket made of goose down is extremely packable and incredibly warm for its weight. It is also the most comfortable among the jackets.  The only disadvantage may surface in case of rain or wet conditions.  Down jackets are specified with the “Fill” power of the feathers and a Fill Power of 600 and above are recommended for buying.

Down Jacket
Down Jacket

3) Outer layer: The outermost piece of clothing on mountain is normally a a jacket or shell which can cut the fierce wind. It is the windchill which often makes things harsher. Occasional rain or drizzle is common on high altitude so it is nice to have a wind blocker jacket which is also waterproof or at least water repellent.

Windproof cum Waterproof Shell/Jacket: Often on the mountain the wind chill factor is responsible for cold conditions.  Some windproof products are coated with water resistant synthetic coating and are most useful. These jackets used as an outer layer will block the wind, protect you from drizzle or light rain while on the walk and are breathable. Apart from the high products, complete rainproof jacket may give protection from heavy rain but mostly are not breathable and comfortable.

Windproof Shell
Waterproof Shell

Above 3 layers complete the clothing for any trek on the Himalayas. Typically during the walk you should wear the Base layer and keep the Outer layer handy when required. After reaching camp site Mid layer is required, specially during the evening or in the morning. For winter treks you can carry one thermal as an additional Base layer (useful in the evening and morning).

Rucksack/Backpack:

This is a critical item especially for them who don’t want to give their packs to the horse or a porter. Carrying a rucksack on a difficult trek becomes a necessity. We feel that a trekker should be able to carry his or her rucksack in most of the cases. Life saving things like heavy jacket and sleeping bag should always be carried in the rucksack to avoid unwanted situation or benightment. Backpacking is really an art and doing it more and more people learn to pack. Assuming decent quality clothing and sleeping bag which are appropriate for the mountain, a backpack should not weigh more than 12 Kg, even for a long trek of 9/10 days. The following things are to be considered before buying a suitable rucksack.

A) Size: Depending upon the duration of the trek the size of the backpack varies.  Considering the treks on the Himalayas ranging from 5 to 10 days a backpack of 40 to 60 L is sufficient. Don’t buy unnecessarily large backpacks which are heavy by its own weight.

B) Internal Frame: Always buy a rucksack supported by an internal frame made of metal or alloys. This frame is a must in a backpack as it prevents the bag to sag and keeping the balance. A well designed frame will transfer the load to the waist belt and shoulder strap and distribute the load evenly on the torso.

C) Shoulder strap and Hip belt:  Always buy a rucksack with adjustable shoulder strap and hip/waist belt. These should be well padded with comfortable and quality foams. The strap and padding  are better if covered with seat wicking ventilation mesh.

D) Ease of packing: Most of the backpacks have top and front panel access. Some larger packs are designed with a separate sleeping bag compartment. Occasionally some do have a backdoor also for quick access to the main compartment. All of these will have multiple pockets, sleeves and lids for different purposes.

E) Rain fly/ Dust cover: It is wise to buy a backpack which comes with a rain cover. A water proof rain fly will protect your clothes and sleeping bag from rain. Also it helps to keep away the dust.

Osprey, Gregory, Camp, Mountain Hardwear, The Northface, Deuter etc are few leading world class manufacturers of backpacks. In India the choices are limited to Quechua and Wildcraft.

There are local manufacturers in and around Kolkata like Alpine Equipment or Cliffline Adventure Gear who make decent rucksacks at a very competitive price. Both of them have a wide range of products including budget quality Wind Proof, Warm Jacket, Sleeping Bags, Day pack etc.

Rucksack
Rucksack
Share this:

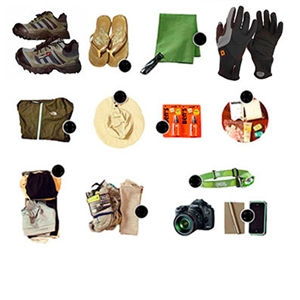
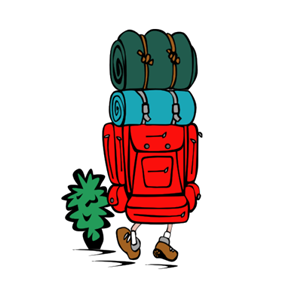
List of things to carry on a Himalayan Trek:

Below is a list of personal articles which are required for a trek on the Himalayas. This guide helps you to give an idea about the things that you need to bring in as a trek member. Depending upon the number of days of trek, the articles quantity may vary and this list is made considering the trek duration being 5 to 7 days (week long treks). Always try to avoid unnecessary toiletries which are heavy and of little use on mountain. Pack light.

For selection of personal gear/equipment and backpacking please read the articles carefully, before buying an item:

https://dev.himalayatrekker.com/trek-essentials/selection-of-equipment

https://dev.himalayatrekker.com/packing-rucksack

Item Quantity Remarks
Sleeping Bag 1 HT will provide. Bring your personal one rated for high altitude in case you have. Personal one is always better for hygiene.
Sleeping Mattress (Foam/Rubber) 1 HT will provide.
Trekking Shoe 1  A good quality rubber sole with ankle support (Medium or high ankle) shoe. Break in well in advance that you don’t face any sores/blisters when you are on mountains. Waterproof quality is highly advisable.
Rucksack/Back Pack 1 Must, Between 40 to 50 Litre
Rucksack cover (Waterproof) 1 Good to have for protection from rain/dust/stain etc.
Daypack/Knap sack 1 Optional (Can carry along with you with water bottle, food, camera and wind/water proof etc) if you want to offload your Rucksack in permitable routes.
Thermal wear (Base Layer) 1 pair Upper and lower (Woolycot). Must for winter treks.
Under garments/Inner wear As per need
Cotton socks 2/3 pair Use full length socks (Don’t use tennis socks)
Woolen socks 1 pair Nice to have
Woolen gloves 1 pair Must
Waterproof gloves 1 pair Optional. Useful especially on high altitude treks where snow/ice is encountered.
T-shirt 3/4 As per need. Take at least one dry fit/quick dry type of synthetic material.
Trek pants 2 Can be Track pants (Avoid cotton), 3 quarter/Cargo or Convertible kind. One dry fit lower of synthetic material is recommended.
Camp sandal 1 pair Can be a strap on sports sandal/Hawaiian sleeper.
Balaclava/Woolen skull cap/Monkey Cap 1 Must for protection from cold.
Sun cap/Wide-brimmed Hat/Bandana 1 Protection from sun.
Walking Sticks/Trekking Poles/Ski Poles 1 pair Nice to have, reduces the pressure on knees and gives balance specially while descending.
Warm/Heavy Jacket 1 Must. Double  layer/Fleece/Synthetic fill/Down feather jacket. This is your Mid layer clothing.
Windproof Jacket/Wind Cheater 1 Must. A hooded one of water resistant/repellent material. This is the outermost layer of clothing.
Raingear/Poncho/Waterproof clothing 1 This is must, especially in monsoon. Separate upper (with hood) and lower is better option.
Water bottle/Hydration pack 1 Good quality plastic.
Sunglasses 1 This is must for all the high altitude treks. Polarised/Anti glare is always a better option in snow with UV400 (UV A & B) protection. Trekkers with spectacle can order customised powered sunglasses.
Sunscreen lotion 1 Optional. At least 30/40 SPF.
Chap Stick/Cold & Moisturising cream Optional. As per need. Use small tubes/bottles.
Tooth brush and tooth paste 1 Carry smallest available tube of tooth paste.
Towel 1 Medium size (light weight).
Soap/Soap strip 1 Carry small pocket size soap, or Soap strip.
Hand sanitiser 1 Optional. Small bottle
Tissue roll ( Toilet) 1 This is a must item as water may not be available in the vicinity.
Anti Fungal Powder 1 Optional. This helps to keep the socks and the trek shoe drier and odour free to an extent. Carry smallest container.
Knee cap 1 pair Optional. Makes a difference especially if you have knee injures/problems (Neoprene added variant is better).
Torch/Head Lamp with extra batteries 1 Must. Head torch keeps your hands free.
Camera with extra cells 1 Optional. Normally there is no charging point on the Himalayan trek routes, carry sparebatteries/powerbank.
Dry food items Kit Must. Carry some dry fruits, chocolate/energy/protein bars and Glucon D/Tang/Getorade
Personal First-Aid kit Kit Optional – Anti septic cream, Betadine/Dettol/Savlon, Band aid, cotton, crepe bandage, safety pin etc.
Medicine kit


(This is a simple guide line and a doctor’s consultation is recommended.)

Kit

(Mandatory)

a)      General medicines comprising of headache, fever, vomiting, stomach upset and pain killer (Volini gel/spray)

b)     Anti Diarrhoearal

c)      Antibiotics – ( choose broad spectrum antibiotics for treating a variety of infections – carry a course of each)

d)     Mild analgesics – (Aspirin/Paracetamol etc but DONOT take Codeine based painkillers).

e)      Strong analgesics ( Co-Proxamol/Ponstan/Temgesic, use with care).

f)       Anti inflammatory (Nurofen or diclofenac sodium)

g)     Diamox – This helps in acclimatisation (a proper dosage is must if taken. Drink lot of water as this is a diuretic drug.

Share this:

The old adage “Health is Wealth” holds very true for any Trekking/Hiking/Backpacking trip , especially on the Himalayas.

Unlike Mountaineering or Rock Climbing ,Trekking is not any sport but a recreational activity by definition.

Then why do we need to be physically fit before starting a Trekking trip?

The Answer is very simple, the fitter you are, the chances are better that you will extract the most from a trip.

Logically answering the above,

a) As we gain higher altitude in a trek, the air becomes thinner. To cope up with the decreasing level of Oxygen we need to build Aerobic fitness.

b) Defying gravity and walking for a long duration on a steep slope with a rucksack/day-pack require a moderate level of Strength and Endurance training.

Above two get coupled on any high altitude Himalayan trek and it is a must that we spend time and effort to address these.

So how do we achieve the desired fitness level needed for a trek?

This is purely quantitative but again depends on present physical condition, which difficulty level the trek will offer and on the age to an extent.

More the time we spend on physical training better is the result. However this a basic guideline to improve spending at least 8 weeks (2 months).

Aerobic Fitness:

First Phase:

1) Walking: At the starting days it is a good starter. Walk 4/5 Km everyday, if possible on slopes. Maintain a speed. Complete 5 Km walk withing an hour. Continue for 5 days a week for 3 weeks.

2) Stretching: Once you complete the walk , do some usual regular stretching exercises/free hands including shoulder, neck, arms, waist and legs. Always do the stretching after your body is warmed up. Cold stretching is ineffective an may develop injuries.10 to 15 minutes.

Once you complete the initial 3 weeks you can start building up on it. You can start either of the following:

2nd Phase:

a) Jogging can be done inside a park or on a treadmill. Avoid jogging on concrete or tarred surface and use a properly cushioned running shoe. Initially try to cover 3 Km in 20 minutes and later 5 Km in 30 minutes. Follow stretching exercise as mentioned after the Jog/Run. Continue for 4/5 days a week for 5 weeks span.

b) Cycling is another effective way to increase your aerobic capabilities and to shed extra pounds quickly. If you can do an outdoor cycling, nothing compares to it. But in today’s traffic condition it is difficult. Using a static cycle in home/gym, Initially cover a distance of 5 Km in 20 min with easy to moderate resistance available with the equipment. Later using moderate to high resistance cover a distance of at least 8 Km in 30 minutes. Follow stretching exercise as mentioned after the cycling session. Continue for 4/5 days a week for 5 weeks span.

Strength and Endurance training:

You can start this from 2nd Phase of your Aerobic training. Always do the Strength training after the Aerobic training and Stretching.

Aim on building strength in your back, shoulders, arms, and abdominal muscles. Your leg muscles will get stronger through the aerobic training.

a) At home you can do push-ups and sit-ups (abdominal crunches). Do three sets each with a repetition of 10-15.

b) Pull-up or Chin-ups is difficult to start with. If you are able to do then do 3 sets with 5-10 repetitions. Otherwise take someone’s help and do assisted pull-ups of 3 sets with 8 to 12 repetitions.

c) Free squats of 3 sets with 10-15 repetitions. Avoid this if you have/had knee injuries.

d) In a gym or home you can do few basic weight training like biceps-curl, triceps press and shoulder press. Consult a physical trainer before this workout. Do 3 sets of each with weights ( as suggested by the trainer ) for 8-10 repetitions.

Does an experienced trekker also need physical fitness?

Certainly! Each and every time we go to the mountain, we must have the physical fitness level to deal with. The only advantage he or she has over a first timer is that knowing or expecting things which are not common back in our home. This deals purely with the mental preparation before a trek. As this is qualitative in nature so it is unjust to expect from the first timers. Once experienced on ground reality, we understand and develop a sense of it.

Share this: