Namaste, greetings from India :). Most likely, you are planning your next trekking trip in the Indian Himalayas. Or maybe you’d like to include a trekking or hiking option in your India tour? If either of the answers is yes, please continue reading. Here is your comprehensive guide to getting the essential information and planning your India trekking trip.

We divide the article into two major parts, in which it will give you both general and specific information. However, the aim of this article is not to describe trek routes in India but to provide a more broad spectrum of understanding to get it right from the very beginning.

  1. A general guide about travelling in India
  2. Planning your trek in the Indian Himalayas

1) Travelling to India: A general guide:

India is a diverse and culturally rich country that is home to 1.4 billion people. Different languages, dialects, food habits, and customs are great to experience. At the same time, things can go crazy being just unaware of! Here are some things to keep in mind before visiting India:

Visa and Entry Requirements:

Foreigners including OCI must have a valid passport and a visa to enter the country. Make sure to apply for your visa well in advance of your planned travel dates. (Official link: https://indianvisaonline.gov.in/)

Climate and best season to visit:

India has a tropical climate in general, with hot summers and cool winters. In general, the best time to visit India is between October and March, when the weather is pleasant in most parts of the country. (Source: https://www.incredibleindia.org/content/incredible-india-v2/en/travel/about-india/weather.html).

However, there are many trekking routes, especially the ones going above 4000 m, that may be best suited during the summer (May/June) or the brief post-monsoon season (Sep/Oct).

So, if you are primarily visiting India for a trekking and hiking tour, then carefully check the best time to do the particular route or visit a particular state/region.

Language:

India has 22 official languages; Hindi and English act as bridge languages in urban areas and among cosmopolitans. Traditionally, in major or metropolitan cities, people speak and understand English.

Although it is pretty handy to learn a few basic phrases in Hindi or the local language of the region you are visiting.

Culture and Customs:

India is a diverse country with a rich cultural heritage. Respect the local customs and traditions, dress modestly, and be aware of the local etiquette. Remove your shoes before entering temples and other places of worship, and avoid public displays of affection. (Read more here: https://www.roughguides.com/india/culture-etiquette/)

Food and Water:

Indian cuisine is famous for its spices and flavours, but be cautious about what you eat and drink to avoid stomach illnesses or diahrrhea etc, a.k.a “Delhi belly”. Avoid street food unless you are confident of the hygiene standards. Maybe you taste after your trekking days.

You may stick to bottled water particularly when trasiting till you reach a trekking base.

During the trek, water is collected from available fresh running streams, waterfalls and natural springs. We boil the water and then serve it to you. Normally, it is quite safe to do so. If you have faced potable water issue(s) on a trekking trip before, you may consider bringing a straw or a bottle filter along with water purification tablets (e.g., Katadyn, Aquamira, and so on).

Safety & Security:

Like many other countries, India has its share of petty crime and safety concerns. Be cautious of pickpockets in crowded places, scammers, and touts. Avoid travelling alone at night. You may like to inform your embassy about your tour beforehand.

Currency:

The currency in India is the Indian Rupee (INR, stylised as ₹). ATMs are widely available, and credit cards are accepted in most urban areas. Check with your card issuer to make sure that it works in Indian POS systems (stores, merchant outlets, etc.) if you plan to use one. OTP on phone can be a showstopper.

You may bring as many foreign currency notes as you need. Above U.S. $ 5,000 or its equivalent, just fill in this CURRENCY DECLARATION FORM (CDF) by the Reserve Bank of India at the airport customs/immigration counter.

At the New Delhi airport or in the metro cities, you get money exchangers (forex counters). They will match or perhaps be better than most of what the banks offer.

We advise you to carry cash in INR for smaller transactions andtipping/gratuity.

Health check up and get a travel insurance:

Consult your doctor before travelling to India. Make sure to get all the necessary vaccinations before travelling to India. It is also advisable to carry a first-aid kit, especially when you are on an adventure trip, along with any necessary medications. (Source: https://wwwnc.cdc.gov/travel/destinations/traveler/none/india).

We recommend you buy travel and medical insurance that covers your trek at altitude as well as any evacuation expenses.

If any additional places to visit:

You may also plan to visit a few places before or after your trek. E.g., Delhi, Agra, Jaipur, Rishikesh, Varanasi, Darjeeling, and Kolkata are some sightseeing places that are convenient to travel to and from trek bases. In such a case, design your trip in such a way that your travel time and distance remain minimal between these places and your trekking destination or route.

Although it is far from the Himalayas, it is still noteworthy to mention South India here. It has its share of exotic beaches, forests, and hills, as well as backwaters to ancient temples.

2) Planning your trek in the Indian Himalayas:

Indian Himalayan region (IHR) varies 200-300 Km across width, which  stretches around 2,500 Km in length. This region is remarkably diverse within itself, in terms of topography, biodiversity, weather, people, and culture.

Trekking in the Himalayas can be a lifetime experience, at the same time it requires careful planning and preparation.

Here are some steps to help you plan your trekking trip to the Indian Himalayas:

Choose your destination:

Your trekking destination and time to visit are the two most important factors while deciding on a trek. We can arrange treks covering all  the following states/regions .

Additionally, the Himalayas offer a variety of trekking options, from easy, relaxed walks to the most challenging trails. Decide on the level of difficulty you are comfortable with and choose a trek that matches your fitness level and experience.

Decide on the best time to go/Season for a prospective trek/region:

A banal way to describe the best time to go trekking in the Indian Himalayas is from “April to June” and “September to December”! Usually, these months offer good weather conditions, clear skies, and stunning views, and that is it. Now your best time to visit will greatly depend on the route or region you are eyeing.

It is noteworthy to mention that the same trek may be suitable in different seasons with very different perspectives. This needs a more detailed understanding, which we will discuss in a different blog. Here are our lists of:

Get in shape:

Trekking in the Himalayas can be physically demanding, so it’s essential to be in good physical shape. If you are already in a fitness regime, you are surely at an advantage. Otherwise, start a fitness programme at least three months before your trip to build some endurance and strength.

Here is a starter for the beginners:

Physical Fitness

Hire a professional tour operator (permits, guides, support staff, and logistics):

Hiring a trekking guide is a must (with the exception of a few pilgrim trails). It is much easier to get the required trekking permits from the concerned authorities (like the IMF, the forest department, the district magistrate’s office, etc.) through a registered tour operator. They can provide you with valuable local knowledge, recent weather patterns and updates, suitable alternates, and help with the necessary logistics.

A major part of the Indian Himalayas is significantly remote compared to many other popular mountain ranges across the globe. Only a handful of treks are possible in “Teahouse” mode; otherwise, camping is essential for most of the trails.

Pack wisely:

Packing light is the mantra on a backpacking trip. Pack essential trekking gear including:

  • A backpack and a small day pack. Additionally you can take a duffel bag etc., if you are on a longer tour.
  • Good quality hiking boots, a quick-dry base layer, warm clothing, gloves, a cap, a sleeping bag (check with your tour operator whether they can provide a suitable one or not), water, and a waterproof outer layer with a hood.
  • Sunglasses/anti glare glasses and head torch a backpack , sunscreen lotion, biodegradable toilet paper, zip lock/dry bags, water bottle/hydration pack, and a first aid kit.
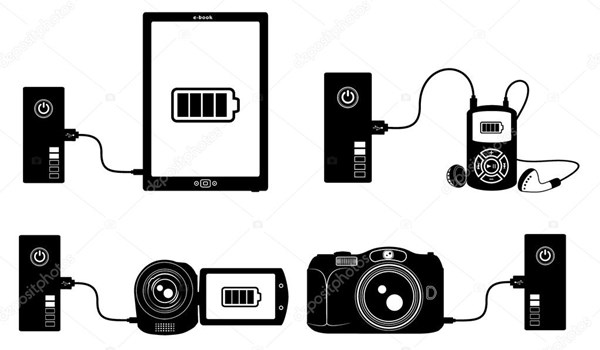
  • Camera, battery packs/powerbanks or a solar charger. You don’t get an electricity connection after reaching a trek basecamp.
  • If your periods may overlap with trekking, then do read this article.

How you should pack your backpack for trekking?

Transport and reaching trek base:

Air connectivity within major Indian cities is good. Additionally, India has a vast railway network. You may choose to take a flight or train from your port of entry, e.g., New Delhi, Mumbai, or Kolkata, to the nearest airports or railheads for your destination. Remember that the Himalayan trek bases are remote places and that the road is the only connection. So finally, you have to take a car ride to reach a trek base and return from the trek end point. Here is a brief outline:

Sikkim Darjeeling treks: Fly to Bagdogra (IXB) from Delhi or Kolkata (CCU) or take a train to New Jalpaiguri station (NJP). From here, base camp is a day’s drive away, and it will take a day to return.
Uttarakhand treks: From Delhi, either fly to Dehradun (DED) or train/bus to Dehradun/Rishikesh (approximately 6 hours). Base camps are full day drive (approx 10 hours) and similarly a day to return from trek end point.
Himachal Pradesh treks: From Delhi take an overnight Volvo bus to Manali or Dharamshala.
Kashmir treks: Fly to Srinagar (SXR). Trek starting points are usually a half-day drive (4 to 5 hours) and so is the return to Srinagar.
Leh-Ladakh treks: Fly to Leh (IXL) or take a scenic drive from Manali or Srinagar to Leh (2 days with a night halt in between).

Within metropolitan cities, you will find metro railways/subways, and city transit buses. In addition to that, you will get prepaid taxi services like Ola or Uber or an Auto Rickshaw for getting around.

Follow the local customs and culture:

The Himalayas are home to many different cultures, and it’s essential to respect the local customs and traditions. Dress appropriately, be respectful of local customs, and ask for permission before taking photographs.

Acclimatise properly:

Your trekking itinerary should provide you with the minimum acclimatisation one may need at altitude. Otherwise, you may suffer from altitude sickness, which usually manifests as a headache with other symptoms including nausea, vomiting, and loss of appetite. If you don’t acclimatise to these existing conditions, then you will have a high chance of getting Acute Mountain Sickness (AMS) at an altitude of  ~ 5000 m (16400 ft). If you have already found problems with altitude, we strongly recommend spending more time to acclimatise than the usual suggested itineraries.

Spend at least 3 nights between 1500 and 3000 m (5000 to 10000 ft) before you go higher. Usally, treeline ends a bit higher than this altitude, at ~ 3300 m, in the Western Himalayas. In the Eastern counterpart, treeline recedes by about 3600 m.

Eat as much as you can and drink plenty of water. Keep yourself hydrated. Avoiding alcohol and smoking.

Safety, emergencies and evacuation:

The mountains have rules. They are harsh rules, but they are there, and if you keep to them you are safe – Walter Bonatti

Your safety during the trek greatly depends on your tour operator. Use adequately rated personal and camping equipment. As already said elsewhere, trekking in the Indian Himalayas is quite interior and wild in a sense. So help is likely to be difficult to get in the mountains. A professional and experienced support team is likely to deal better and act faster on the mountains.

Shifting climate patterns have become a concern in the Himalayas too. Even a better weather forecast can switch to a worse one within a day or two. Mobile networks usually work until trek base camps or a bit further. To use a satellite phone in India, one needs to obtain a permit for the specific purpose which is a lengthy process. Additionally, you will not get permission if the trail is near the international border or goes inside protected areas, inner line areas, etc.

Evacuating someone ill or seriously injured on the mountains in general is human-assisted, sometimes using a horse if there is a chance. The first big job is to get to the base camp. From here on, basic medical facilities like a continuous oxygen supply or an intravenous saline system may only be available after a 2 to 3-hour drive to the nearest government health centre or so.

To sum up, it is essential to prepare mentally and physically to deal with the uncertainties and unpredictabilities of the mountains.

Add a few buffer days:

The Himalayas can be a bummer due to bad weather or a rare bad day when you are really unwell. So, it is wise to keep a day or two buffer at the end of your trip.

In case you don’t use these day(s) during the trek, you have plenty of options in places like Darjeeling, Rishikesh, Manali, Srinagar, or Leh.

Enjoy the journey:

Finally, it is all about the journey, and the stunning views of the Himalayas may be a key driver. Be flexible and humble in the mountains; take breaks; enjoy the scenery; and appreciate the unique experience.

We hope the above piece of information helps as a starting point for planning your next trekking trip in the Indian Himalayas. Please feel free to get in touch in one of the following ways:

WhatsApp: + 91 9477877559, 9831112469, 9163183000


Share this:

Sikkim has always been a special interest to a section of travellers all around the globe. Apart from its natural beauty, Sikkim is still a little known Himalayan space, isn’t it?

Whether to get a closer look at the big Himalayan mountains or to taste the core nature of Sikkim, you will probably plan a:

  • Full trekking programme.
  • Or visiting interior places in Sikkim, villages and hikes connecting the core of Sikkim and its people, culture or religion.

But what if you are a:

Foreigner or an Overseas Citizen of India (OCI) travelling alone? Or are you keen on a solo hiking experience?

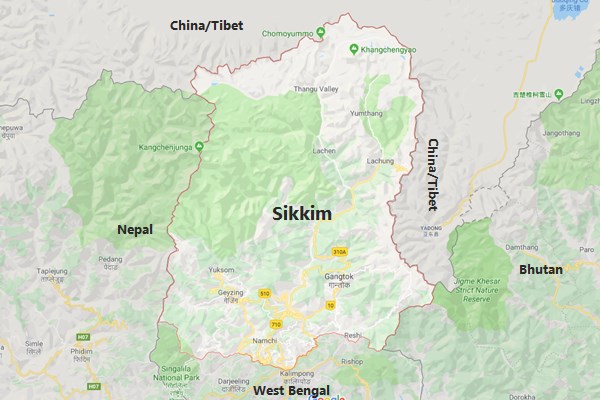
Sikkim has an international border with multiple countries and requires some paperworks to get in and trek.

First you need to get an Inner Line Permit (ILP) also called Restricted Area Permit (RAP) while visiting Sikkim. This is easy to get, free of cost and issued to a solo traveller or a group. You can get it done at Bagdogra airport, Darjeeling DM office or any of the Sikkim road check posts at Melli, Ramam, Rangpo, on the spot.

However, you need a special Trekking Permit for most of the treks in Sikkim. Officially this is called Protected Area Permit (PAP). You must obtain PAP for all major treks that are inside National Parks/Sanctuaries/Designated areas etc. As a matter of fact, most of the trekking trails like Goechala, Dzongri, Phoktey Dara or even Maenam top trek requires a PAP.

OK, what else?

You must be a minimum of two foreigners to apply for such a permit. Tourism and forest department will  issue the necessary permit(s).  If you are already together, we will take care of the rest.

A problem which you just realise now? A sudden show stopper that you can’t plan any further? Hold on, we have good news for you.  Yes you can still plan and execute a trek in Sikkim.

To solve your problem, you may do one of the following:

1) Join a Fixed Group Departure trek:

You will see a list of available group treks in our Upcoming Trek Calendar. Usually this the convenient and economic option if you are travelling alone.

This looks quite simple but not so! First of all we must have foreigners already registered and confirmed on a fixed departure. Then only we may go ahead and process your trekking permit(s) along with the other foreigners in a group.

For a popular trail like Goechala, you may get such a group or two during the season. However you may not be able to book it readily but wait for a while.

If the above solution doesn’t work for you, check out the following options. Understand that the logistical expenses are shared when you trek in a group. Trekking alone with a guide is typically NOT a budget friendly option.

2) Treks which you can do with a guide as a solo foreigner in Sikkim:

What if you are particularly looking for a solo trekking experience? Note that you must take a trekking guide in Sikkim. This is required for permit(s) and for security reasons as well.

We do have curated treks like Sikkim Monastery trail (a fantastic cultural walk) or pristine camping trail to Bajre Dara Top in west Sikkim. You don’t need a PAP for these treks and may club any of these treks within your Sikkim tour. We can modify, extend or shorten the itinerary that suits you.

solo-trekking-option-sikkim-for-foreigners
Trekking solo in Sikkim

3) Choose neighbouring Darjeeling treks instead:

There are many similarities between Sikkim and Darjeeling treks. Be it the landscape, weather/season or be the culture and language people speak.

You don’t need to be a minimum of two people together to get a trekking permit for the trails inside Darjeeling, West Bengal. You can hire a personal tour guide and complete Sandakphu trek or the longer circuit which includes Phalut.

If you need more clarifications or have queries on budgeting etc, please dont hesitate to get in touch:

WhatsApp: + 91 9477877559, 9831112469, 9163183000
Share this:

DON’T avoid or postpone your upcoming trek plan because of Period woes:

Oftentimes, we have seen women undecided about their trekking plans if their period dates are coinciding. There are several myths such as, is it safe or hygienic enough to go on a trek during periods which leads women to step back from exploring should their menstrual cycle falls around their trek plans. So, we thought of clearing the clouds from your mind and help you understand that it is perfectly fine to go on trekking during periods as long as you keep a few things handy and maintain your hygiene. After all, don’t you all continue your day to day lives; go to work or college while you are on your period? Then why miss an opportunity to go to the mountains which you plan probably once in a year against something that comes back every month to bother you for a bit?

Let us try to clear some of the general misconceptions and offer you some guidance which hopefully will be able to assist you in planning your next worry free (if not period free) trek.

Will trekking heighten my period cramps?

Most unlikely.It is a misconception that the amount of physical exertion which is required during trek will heighten the cramps. In fact, hiking is a form of an exercise which possibly will provide more relief in lower back pain or stomach cramps in such times. Having said so, women who experience extreme levels of period cramps can look at deferring their trek plans. Women with moderate levels of pain can carry prescribed pain-relieving medications during their trip.

Things to carry while trekking during the period?

Carry sufficient number of sanitary napkins /tampons/menstrual cups – Cotton Tampons are light weight and take less space in your backpack as well. They are more effective than napkins when you are trekking during the rainy season or require crossing a stream or a river as these do not get wet

Using menstrual cup is more convenient and environment friendly

These are washable and reusable and do not get wet as well. If you are already using period cups, then there is no need to worry about disposal. And if not an user and is planning to use it during trek, we suggest you start using it a couple of months in advance to get a hang of it.

Carry sufficient quantity of underwear/extra pant(s) for personal hygiene.

In case you are not accustomed to either tampons or menstrual cups, using sanitary napkins are equally fine. Similarly, extra pants will be your SOS in case of any unwanted stains. In case of stains while on the trail, just wrap your sweatshirt or a jacket around your waist and carry along!

Carry leak proof Zip-lock bags and line it with aluminium foils for disposal of used napkins or tampons.

It keeps the foul smell of the used napkins /tampons at bay. After changing your napkins/tampons you can place it in the aluminium tinted Zip-lock bags and keep it in a separate chamber of your backpack. Remember we cannot throw our used pads/tampons in the mountains where we will be camping in tents. Hence, we should carry it back until you reach the trek base or a lodge where solid waste management is in place and dump the waste in the dust bin.

In case you are using a menstrual cup, you may use the toilet tent (provided in a camping trek) to empty the cup into the hole and bury it with soil. Wash the cup with warm water which will be available at the campsite. Should you need to empty it on the trail, you can dig up a cathole preferably away from the trail or any water body and then bury it up with soil. You can use your drinking water to rinse the cup.

Ease of disposal on homestay treks

There are some treks such as Sandakphu or Valley of Flowers etc. where trekkers spend the nights in homestay or in lodges. In such cases, a proper bathroom facility is available for changing and disposal of the used pads/tampons.

Finally, a hand sanitiser and box of wet wipes are a must for personal health and hygiene.

It is OK to inform the organisers

Usually, the trek crew or the organisers will be men and they might not get it but please know today’s men are much aware of what is it and what women go through. We understand the challenges girls go through. So please don’t shy away & let us know if your trek dates are clashing with your period dates. That way we can inform the on-ground trek crew to be more empathetic towards your situation and help you in any way possible to make you comfortable.

Keep yourself frequently hydrated during period while on a trek

Water – Do drink sufficiently while trekking on period. It is anyway important to stay hydrated when in higher altitude to avoid any kind of sickness. But in case you are on period , water is your best ally to keep those cramps in check.

Carry ORS powders -We understand, period days can be hard on your health and makes one generally feel tired & fatigue. To get one going, we suggest carrying ORS, mix with water and keep drinking it along the trail to keep you energised.

Medications & Mood swings

In case you are one of those who love to not get bothered by period on your precious holidays, then the ideal thing to do is to take prescribed pills which helps in deferring your period date in case it is clashing with your trip dates. Usually doctor prescribed pills have negligible side effects and if taken a few days in advance before the possible date of period, it postpones the flow.

As for the oft talked about mood swings that comes along this time, trust us the fresh air of the mountains and the Himalaya has its own charm to keep the mood more at its best.

With all the necessary things in place, we think you are all suited up for your next meet up with the mountains. See you up there.

Share this:

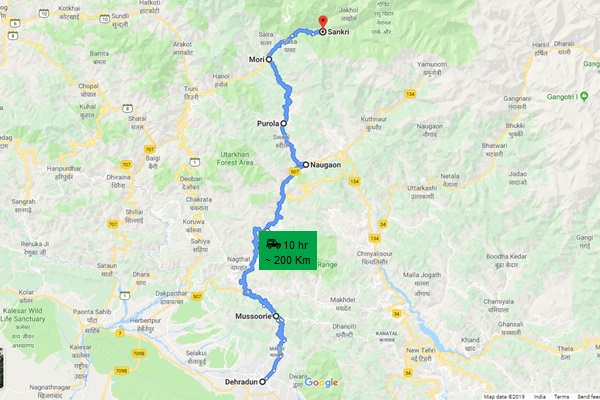
Sankri village is the trek base of popular trails like Kedarkantha or Har Ki Dun trek. It is also starting point of treks like Bali Pass, Borasu Pass, Phulara Ridge and some other. Nowadays Sankri is growing as a popular hill destination too.

You will get direct busses from Dehradun to Sankri in the morning till 8 am. Be it in a reserved car or by bus, it usually takes no less than 9/10 hours to travel around 200 Km distance.

Basic Facts:

Location: Uttarkashi district in Uttarakhand
Nearest Railway station: Dehradun (DDN) & Haridwar (HW)
Nearest Airport: Jolly Grant, Dehradun (Code: DED) or Delhi
Nearest Bus terminus/hub: Dehradun Inter State Bus Terminus (ISBT)

Distances to Sankri:

Dehradun: ~ 200 Km
Haridwar: ~ 260 Km
Rishikesh: ~ 245 Km
New Delhi: ~ 450 Km

Mode of transportation to Sankri:

Private mode: You can hire a cab from Dehradun, Rishikesh or Haridwar.
Public mode: Direct busses from Dehradun.
Note: No shared car service from Dehradun.

Road route to Sankri:

Shorter route: Via Mussoorie
Longer route: Via Vikasnagar
Major points: Mussoorie/Vikasnagar, Damta, Naogaon, Purola, Mori, Netwar.

Reserved car fare to Sankri (as of Oct 2019):

From Dehradun: ₹ 6,000 for a Tata Sumo/Bolero; ₹ 9,000 for Tempo Traveller;
From Rishikesh: ₹ 7,500 for a Tata Sumo/Bolero; ₹ 11,000 for Tempo Traveller;
From Haridwar: ₹ 8,500 for a Tata Sumo/Bolero; ₹ 12,000 for Tempo Traveller;

Bus service timings and fare from Dehradun to Sankri (as of Oct 2019):

Private bus (ordinary): ₹ 400 per person. Starts at 5:30 am, 6:30 am and 7 am from Gandhi road, 2 mins walking from Dehradun railways station. It may take 10 to 12 hours with few breaks in between.
State/Govt. bus (midi): ₹ 450 per person. Starts at 8 am from Mussoorie bus depot, outside Dehradun railways station. Normally it take less time than private busses and goes via Mussoorie. This is often referred to as ‘Roadways bus”.
Note:

  • On board tickets.You can’t book online or in advance.
  • State bus is the last one to start. If you decide to take this, be sure it is operating on the very day. Otherwise private bus is a safe choice.
  • While returning from Sankri you will get the same busses starting between 6 am to 8 am.

Additional facts:

Last ATM on the way: Mori, 25 Km before Sankri. Withdraw cash well in advance, as this ATM may not have link or cash either.
Mobile network: All major networks at Mori. Sankri has very limited or no mobile connectivity most of the time during a year.

Share this:

Indian state of Sikkim has some regulations and accompanied restrictions with respect to travelling and trekking within the state. This is due to its international border with multiple countries. You need to obtain certain permits, depending on your:

  • Area or places of visit
  • Nationality

Here we will elaborate about the different permits and any fees required by the administration/authority. Also we hope that this will help you to plan travelling independently inside Sikkim.

There are two main type permits and are as following:

  1. Restricted Area Permit (RAP), same as Inner Line Permit (ILP) – issued to solo travellers or groups
  2. Protected Area Permit (PAP) commonly knows as “Trekking Permit” – issued to a group of minimum 2 people

In brief:

  • If you are an Indian citizen, you will need PAP to visit certain permitted areas in North and East Sikkim during your sightseeing tours. For different trekking routes you need to obtain the applicable permits
  • Otherwise if you are a foreigner, you must obtain a  RAP, commonly referred to as ILP to enter into Sikkim. This is required for Overseas Citizen Of India (OCI) as well. Additionally you will require PAP for trekking in West or North Sikkim or the permitted areas  in North and some areas of East Sikkim.

Both the Indians and foreigners need to apply PAP through a registered tour operator.

Chek official Sikkim Govt. portal for RAP and PAP.

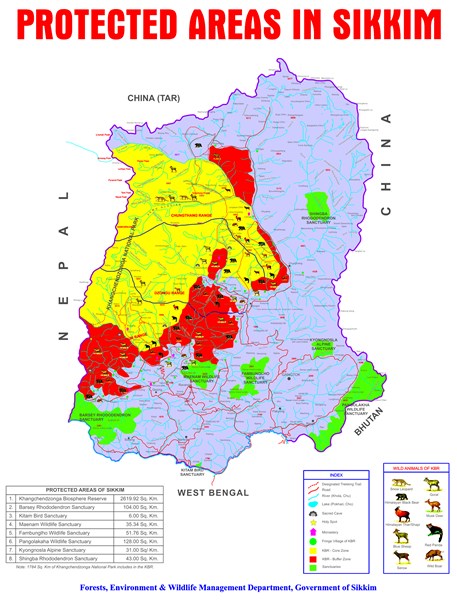
Which are the Protected Areas in Sikkim?

Below is an outline of Protected Areas inside Sikkim. Note that you will require PAP for entire North Sikkim district and some areas of East Sikkim district. Check the full size map of Forest Department, Govt Of Sikkim here.

protected-areas-in-sikkim
Protected Areas in Sikkim (Sanctuaries and Biosphere Reserve)

For Indian Nationals:

  • For trekking in West or South Sikkim districts, e.g., Goecha La, Singalila Pass, Dafeybhir Trek, or Maenam Peak, you need to get an entry permit and pay applicable entry fees and camping charges inside a national park or sanctuary. It is done on the spot at the respective trekking base camps.
  • E.g., on a trek like Goecha La or Dzongri, you need a trekking permit inside Khanchendzongha National Park (same as Khanchendzongha Biosphere Reserve) and a verification process at the SDM office in Yuksom. Carry the original and two photocopies of your ID card with address proof on it (Aadhar/Driving Licence/Voter ID/Passport; PAN cards are not accepted). You may have to submit a self-declaration at the Yuksom police outpost. Also, carry two recent passport-size photos for the verification process.
  • For sightseeing tours within the permitted areas inside North and East Sikkim districts, you will need a Protected Area Permit (PAP).
  • E.g., tours to North Sikkim (Lachung, Yumthang, Lachen, Gurudongmar Lake, etc.) or in East Sikkim like Tsongmo Lake and Nathu La, or the Old Silk Route (Zuluk, Kupup) in East Sikkim. Apply this through a registered tour operator only.

For Foreign Nationals (including OCI):

1) Restricted Area Permit (RAP/ILP):

All foreigners (some relaxation to Bhutanese citizens) will require ILP/RAP to enter inside Sikkim. This is FREE OF COST.

  • China or Hong Kong passport holders must apply for ILP/RAP through Ministry of Home Affairs, Government of India, New Delhi. Taiwanese citizens are not allowed in Sikkim. Bangladesh passport holders are now can normally apply and get their ILP like other foreign nationals.
  • Any other foreign nationals can apply and obtain the ILP (RAP), Free of cost, at the FRO (Foreigners Registration Officepolice check points while entering into Sikkim state. You need to have original Passport, INDIAN VISA/e-VISA with photocopies and 2 recent passport size photos.
  • Usually  it is issued for 15 days initially. It can be extended to another 15 days but to get an extension you need to exit Sikkim and apply again when you re-enter.
  • Diplomatic Passport holders need to apply directly to the Govt. Of India through their respective consulate or embassies. It takes usually a month or more to go through the lengthy process. Apply well in advance.

Below are the ILP issuing office on Sikkim road border and other places around:

Note: ILP issuing time is from 8 am to 8 pm everyday, although we recommend you to reach any of the check post  before 6 pm.

Melli check post, South Sikkim, on your way from Bagdogra/NJP/Siliguri to West Sikkim (e.g. Yuksom, Pelling, Hilley, Uttarey etc.) or to South Sikkim ( Ravangla, Namchi etc)

Rangpo check post, East Sikkim, on your way to Gangtok and East & North Sikkim.

Ramam check post, South Sikkim, on your way from Darjeeling to West Sikkim (Yuksom, Pellling etc). This West Bengal Sikkim border check post is having an FRO office now and issues ILP.

Bagdogra airport counter: This is not consistent and dont depend on this!

Darjeeling DM office: If you are already visiting Darjeeling city or around, then you can make your ILP here as well.

2) Protected Area Permit (PAP/Trekking Permit):

  • All major trekking routes in Sikkim fall under national parks or sanctuaries and hence will require a PAP.
  • Foreigners who wish to trek to Dzongri or Goecha La, Singalila Pass or Phoktey Dara (Barsey Rhododendron Sanctuary), Round Singalila Dzongri (Uttarey to Dzongri) or Maenam & Bhaleydhunga (Maenam will require an additional permit called Protected Area Permit (PAP, often referred to as Trekking Permit).
  • This is issued to a minimum group of 2 persons or more (not issued to a solo traveller), upon submitting your ILP, visa and passport.
    Adventure Cell of Tourism & Civil Aviation Department, Govt. of Sikkim, Gangtok:

Note: Green Lake trek in North Sikkim requires Alpine Mountaineering Expedition permit, which in turn needs more approvals, time and high expenses. Different permits are needed from Sikkim state/Indian Govt. plus a Liaison Officer from IMF Delhi will be appointed. This is applicable for both the Indian and foreign nationals.)

 How a foreigner can book a trek in Sikkim with us, HT? 

  • We will require at least one additional day to process the PAP/Trekking Permit. This can’t be processed in advance and we can only apply once we receive your signed copy of ILP. This means that you can’t start the trek very next day you enter Sikkim. We would recommend a couple of days in advance.
  • To open booking, we will require a minimum of 2 foreign nationals trekking together. Later we can take solo trekker booking in the same group.
  • We charge an additional 4000 as Service Charge + 5% Govt. Tax per person to process the Trekking Permit and to counter the differential of various permit fees inside Kanchendzongha National park for Non Indian nationals. It covers the cost to send someone to Gangtok for processing the Trekking Permit and get it back at the respective trek base like Yuksom, Hilley, Uttarey etc.

To summarise it is not difficult to get the required permits to trek inside Sikkim if you are:

  1. minimum of a group of two persons.
  2. have couple of additional days to spend in Sikkim before the trek; There are plenty of these places  🙂

Do carry multiple copies (both hard and soft versions) of your recent passport size photos and photocopies of your documents (Passport/Visa/ILP) to avoid a showstopper on mountains!

Feel free to get in touch with us:

WhatsApp: + 91 9477877559, 9831112469, 9163183000
Here is our list of all

SIKKIM TREKS

bajre-dara-trek-sikkim
4.80 / 5 reviews
per person
Kanchenjunga-sunrise-closeup-from-dzongri-trek
5.00 / 2 reviews
per person
Goecha la trek
5.00 / 13 reviews
per person
sikkim-monastery-trail-trek
5.00 / 4 reviews
per person
Share this:

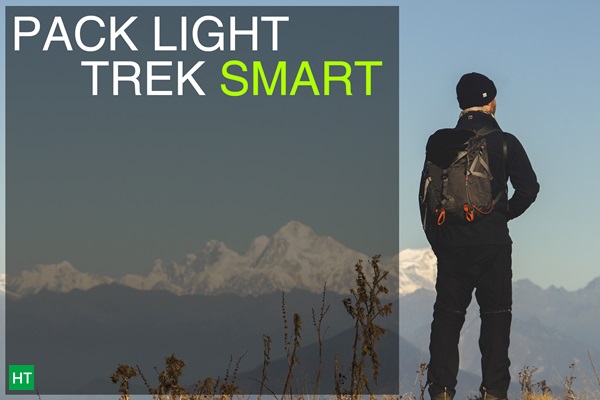
Don’t let your heavy rucksack spoil the fun of your hike – pack LIGHT, trek SMART

Whenever you go for a hike, be it a coastal or jungle trek or be on a rigorous high altitude trek, it’s hard to let go of everything and simply enjoy your being in your personal heaven, when your back is continuously shouting for relief. Remember those beautiful snaps you never took because your sack was so heavily plunged on your shoulder that you couldn’t even afford lifting your arms up. And the view finder thus never met your eyes. The tragedy sounds familiar?

heavy-rucksack-causes-problem-on-a-trek
Avoid carrying excess in a rucksack

Here in this blog we’ll try to have some practical solutions to this problem. Though it’s kind of fun to get pissed at these things in your first three four hikes and then come up with original solutions yourself, it doesn’t hurt to come prepared in your first trek.

1) Carry Only the Essentials:

There will always be a few things which you might need while travelling but are of no use while hiking. Leave that extra weight behind at a cloak room or locker at a Junction point where you’re going to come back after finishing the trek. Collect your stuff while returning.

Now while hiking you don’t need more than one spare clothing. Weather in high altitude is quite unpredictable. Still it’s safe to carry just one spare T-shirt or one spare trek pant. No need to carry jeans or formals.

Research thoroughly about your destination. Check the usual weather pattern of that region on your chosen date window. Plan the journey to the trek base from your hometown. Count the days and try to carry the bare minimum you need for these many days.

When you plan to join any trek with us, we take care of all the central logistics. You don’t even have to bring your own sleeping bags. All you have to bring & carry are your personal belongings. If you’re planning to go solo or independently this list of things to carry on a trek ( or Download PDF) will help you to understand what all gears are necessary for a high altitude trek in the Himalayas.

lightweight-rucksack-packing-tips
Carry only the bare minimum & fly high!

2) Buy the Lightest Gear Available :

21st Century is a blessing for hikers, in terms of availability & quality of hiking equipment. Without a doubt gears available now a days are better than ever. Patagonia, Columbia, North face etc are doing an amazing job supplying hikers exactly what they need. In my country, India, though these are pretty expensive options, Decathlon is opening new branches every now & then here.

These companies know the fact that heavyweight gears and hiking doesn’t really go hand in hand. So they are coming up with latest light weight yet more durable weather conditioned gears each year.

These high quality equipment are rather expensive, but  if you do your research and spend a few extra bucks on the right gear, I bet that you won’t repent.

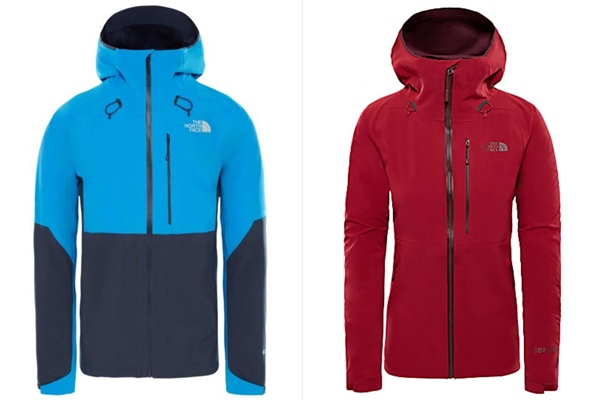
3) Buy One Water Proof cum Wind Proof Jacket , Instead of Two Separate:

Water proof and wind proof jackets are must items to carry be it a short hike or a long one. Instead of carrying two separate jackets for wind and water protection, you can buy just one waterproof cum windproof jacket. It saves both extra space and extra weight required to carry another additional jacket.

use-of-wind-proof-cum-waterproof-jackets-in-a-trek
Use a single wind and waterproof jacket on a trek

Previously in pre Gore-Tex era water proof jackets used to be mostly non breathable and hence very uncomfortable. Now you have wide varieties of option available to choose from.

4) Mirrorless Camera Body:

DSLR / SLR  camera bodies are heavy. On the other hand quality wise DSLR (/SLR) images are the best, especially if you are clicking landscapes. It’s a lifelong dilemma to many hikers to carry their high end DSLRs is their hikes or not.

If you’re going through the same dilemma, check out the mirrorless cameras available in the market. You get full frame  sensors in mirrorless bodies. Since the whole mirror removing procedure is absent in mirrorless cameras, they are technically faster than any average DSLR and now a days they can capture print quality raw images at a speed as high as 12 fps.

dslr-and-mirrorless-cameras-on-a-trek.
Mirrorless cameras are much lighter than the DSLRs

One drawback of these camera bodies being small in size is their battery life. Smaller volume of camera body fits only smaller size batteries. Adventure photographers have always faced this problem with their tiny sports cams( Go por etc). They simply bought more batteries. So if you can throw a few bucks extra for additional batteries, choosing a mirrorless camera for your hiking trip sounds like a good idea. To know a few hacks to increase your battery life while hiking, click here.

5) Carry a Kindle Instead of Book(s):

Are you a regular hiker who likes to read ? But the weight of your books are stopping you to carry any books  in your trek. Or may be you’re worried your books will not endure the rough conditions while hiking.

Those are all valid concerns but you can consider carrying a kindle instead.

Kindles are Digital e book readers available in Amazon store. They have good battery life and can survive a week of rigorous reading in cold weather. And they are really light weight. The heaviest model till date weighs only 374 g.

Once fully drained the dead battery takes approximately four hours to get fully charged. Nowadays waterproof variants are available as well.

use-kindles-during-a-trek
Lightweight and waterproof Kindles

You can also read eBooks in your smartphones or tablets after installing the Kindle app. But reading a kindle is a far smoother experience for your eyes.

packing-the-rucksack-lightweight-in-treks

Hope you’ll find these hacks useful next time you pack for your hiking trip. If you’ve anything to add in this list, let us know below in the comments. Thank you.


Are you looking for a snow trek next winter?

Check out this video


Share this:

Battery hacks to save your camera or mobile battery charge during treks in cold conditions

Have you faced an instance, when you want to capture moments of a trek in the Himalayas, but you have a dead battery? Or you are going for your first Himalayan trek? Following few DO’s & Don’ts you can solve this problem to a great extent.

The Problem:

Cold and damp conditions on trek routes reduce battery performance significantly. Be it your:

  • DSLRs or Point & Shoot cameras
  • Smartphones
  • Power banks
  • Any electronic gadget which uses a battery (fixed or removable).

To give you an estimate, say you click around 500 photos ( in Kolkata, Bangalore or Mumbai etc, not too hot or cold) in your camera or smartphone using one full battery cycle. You may end up clicking 250 to 350 photos on trek routes, if you don’t preserve the battery.

To add on, trek routes are remotest part in the Himalayas. Apart from very few Tea House treks like Sandakphu or Valley Of Flowers, you will not get any charging facility during the trek. So you need to be prepared accordingly.

Saving DSLR’s and Point and Shoot camera battery charge:

DSLR batteries are fairly good with a capacity range somewhere between 1000 – 3000 mAh depending upon the make and model. Still it may run out of juice before you complete the trek. During a trek you may not able to charge your battery for 5 to 7 days or even for a longer duration.

DOs

  • Carry at least one spare battery. Better to use the proprietary one than a common/third party battery. Even better if you already have a battery pack.  For cameras using AAA/AA batteries, carry ample spare (Duracell is better. Don’t forget to bring back the used cells and dispose where it should be.)
  • Always fully charge your battery(ies) before you leave home. Remember that you may not get electricity at trek base or face low voltage problem. After all these are pretty remote locations.
  • Keep the battery in warm place, maybe in your pocket inside sleeping bag during night.
  • Sometimes it helps if you keep your battery exposed in sun for 10/15 minutes. It may regain some juice.
  • Use LCD feature of your camera optimally.

DON’Ts

  • Don’t leave your batteries exposed in the cold, specially during night.
  • Without ample battery reserve don’t walk through and rewind the photos taken, specially in the nights. Its tempting but may hurt later.
  • If you are going to run out of batteries soon, then stop using camera manoeuvres which are battery intensive. E.g. lens movements (zoom in/out) through motor.

Saving mobile, smartphone battery and power bank charge:

Today’s smartphones are ever hungry to consume more and more battery. Apps, location service, large displays, mobile network, all are eating up their pie. At the same time many trekkers are only using smartphone to capture the trek photos. Great camera phones are becoming handy alternate to DSLRs.

No matter how powerful your phone battery is, carry a power bank during a trek. It is indeed helpful when you plan to take photos and videos in your smartphone. Even better, if you have a handy little solar charged power bank.

DOs:

  • Carry a power bank. Charge your smartphone and power bank fully before you travel. You may not get to recharge even at trek base.
  • Switch  to air plane mode during hike. If you need to call someone, check with our staff where you may get a network.  Switching on and off consume more battery.
  • Use battery saving mode whenever possible.
  • Keep your smartphone and power bank in warm place, inside sleeping bag during night.

DON’Ts

  • Network searching dries battery quickly. Use when really required.
  • Don’t leave your smartphone or power bank exposed in the cold, specially during night.

Share this: